Thursday, September 12, 2013

Give Thanks Wreath by me!


It's time for my project over at Craft Project Central!  I was so excited to be asked to join for the month of September, and I knew immediately I wanted to make a wreath for the Thanksgiving holiday.


This wreath is fun to make, uses re-cycled materials and can be customized to any color scheme!  Highlighting the wonderful Sweater Weather Designer Series Paper, it is a mix of naturals, subtle and bright colors, perfect for the autumn season.

Please head over to Craft Project Central!  I will be giving away a free subscription for the month of September to one lucky person!  All you need to do is leave a comment on my project over at Craft Project Central by Wednesday September 18 at midnight EST. This free subscription will provide access to all detailed instructions for all September projects as well as the Card of the month!

Tuesday, September 10, 2013

Book Worm Set by Michelle Wecksler


Another project over at Craft Project Central!


This Book Worm Set  by  Michelle Wecksler is the perfect gift for that special little someone in your life who loves to read! This set features an altered can bookmark holder, four book worm bookmarks, a book list book, a book worm pencil and a fun card for presenting this set as a gift!  Any one of these projects, individually, would make for a wonderful creative session for you and your little one!  You could also create any of these items in a small class or stamp camp to share with others!

Sunday, September 8, 2013

A Challenging Sketch!


This sketch from Paper Craft Crew was a challenge! 


 I think I had three different attempts going, with three different stamp sets and color combos before I found one I was happy with!  I persevered...not wanting the sketch to get the best of me!


I love a challenge though, and am pretty happy with what I ended up with!


  • Initially, and what sent me down a wrong path with my first attempts, I focussed too much on the slanted layer. I was determine to make that a stamped image and just couldn't get the right look.
  • Once I determined the stamped image should be the upper right part of the sketch, and use DSP for the slanted layer..it got easier!
  • I could not get the ribbon to work for me, so I used a piece of Bermuda Bay cardstock in its place.
  • Speaking of which...my colors are a bit washed out!  I am trying to learn how to use the setting on my camera so I need to fix the white balance..or the ISO..or just go back to automatic mode!


I am starting to plan my autumn and Christmas class projects;  these beautiful cool mornings are very inspiring!

and Thanks for the folks over at Sunday Stamps for picking me one of their top picks for their last color challenge!

Thanks for stopping by and enjoy your Sunday!
~ Lauri

stamps: Sketched Birthday
cardstock:  Very Vanilla, Bermuda Bay, Crisp Cantaloupe, Birthday Basics DSP
inks:  Bermuda Bay, Crisp Cantaloupe
accessories:  Brights Dots, Crimper, Square Lattice Embossing folder, Scallop Circle Punch, Large Scallop Circle Punch,1" Circle Punch
challenge:  PCCCS57

Saturday, September 7, 2013

Freshly Made Sketch 102


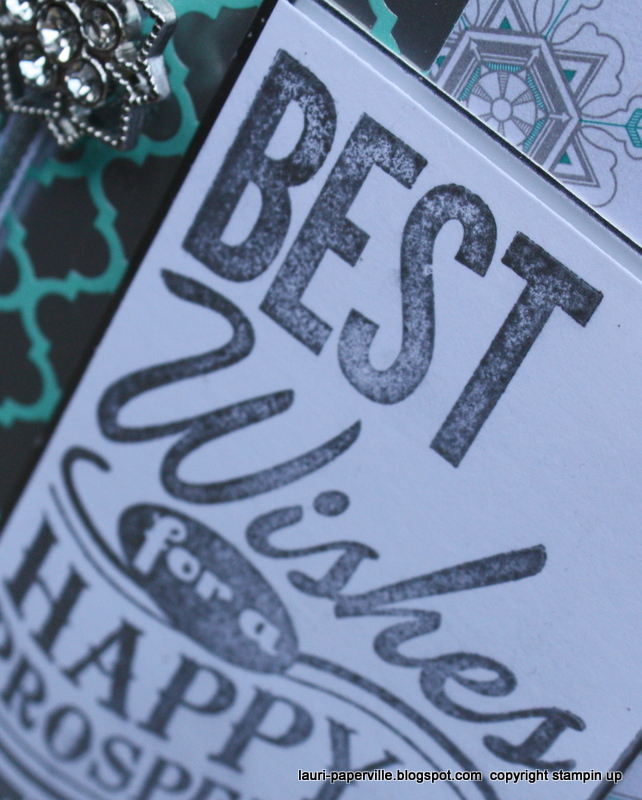
A bright and blingy card for this weeks Freshly Made Sketch!  Not sure this qualifies as clean lines and fresh but...fun!


New Seasonal products galore on this card!
  • Best New Year, a single stamp, that I knew I had to get!  Inevitably I am either late on Christmas cards or forget folks, and like to have a New Year card or two on hand just for that late greeting!  This stamp comes in two parts, so I added the rhinestones in between the two images.
  • I stamped the image in the silver Metallic Encore ink
  • Love the foil accented sheet that comes in the Winter Front Designer Series Paper!  That is the accent piece down the middle.
  • Silver ribbon!  I need to stock on on that;  I am also hoarding those gorgeous Frosted Finishes embellishments.


Thanks for looking and hope you have a great weekend!
~ Lauri

stamps:  Best New Year
ink:  Silver Metallic Encore Ink
cardstock:  Whisper White, WInter Frost DSP
accessories:  Frosted Finishes embellishments, Silver 1/8" ribbon
challenge:  FMS102

Too Kind Card Box and Post It Note Holder by Laurie Zoellmer


Time for me to share a peek of another great project at Craft Project Central.


Laurie Zoellmer has designed a darling card box that will easily hold 4-6 cards and envelopes.   The card box and coordinating Post it Note Holder make a beautiful set for any desk.  Make several sets to give as gifts this coming holiday season!  This project is also a fun class or camp project!

Wednesday, September 4, 2013

Teacher Appreciation Flowers and Frame by Buffy Cooper


Today at Craft Project Central, Buffy Cooper has a great Teacher Appreciation Project.  


Send flowers to the teacher that will last all year!  Create an adorable vase and floral bouquet with a coordinating frame for a class photo, and let your children’s teachers know how much you appreciate them.  Stop by Craft Project Central for all the information on how to get instructions for this great project!

Tuesday, September 3, 2013

More Inlay Technique


A few weeks ago I posted a card I had made with the inlay technique;  shortly after that, Jennifer Mcguire posted an awesome video and made it a whole lot easier to do!  So I decided to try it again, using strips of DSP and  two different die sets.  I love the effect and love that I got two cards from one set of steps!  Here is card one...


I encourage you to watch her video!  Here are a few things I did differently from her steps:

  • While she used strips of cardstock, I chose to use strips of This and That Epic Day DSP.  I also used one of the more solid patterns from that DSP; you can barely make out the inspiring words.
  • I also used (and it works great although really sticky!) the MultiPurpose Adhesive Sheets (product number 120805). She recommended a glue stick, but these are great!
Here is the other card I made with the leftovers from card one.


This is a very fun way to use up DSP and use dies a bit differently!   I am off to a morning at Motor Vehicles to clear up some paperwork stuff...I have spent hours and hours this weekend reading online, compiling documents, filling out forms and praying I have everything so I can get done in one trip.  Wish me luck!

~ Lauri


stamps:  Loving Thoughts
cardstock:  Epic Day This and That, Naturals Ivory
ink:  Crumb Cake
other:  Circle Framelits Die, Backyard Basics Framelits Die, Modern Label punch, Sycamore Street buttons (retired), Linen Thread, Multipurpose adhesive sheets

Monday, September 2, 2013

Sketch Frenzy Friday and a Fall Theme


Happy Labor Day Holiday to those in the United States!  I am seeing signs of fall here in Connecticut, including many changed leaves, which inspired me to do two challenges yesterday, The Paper Players Fall Theme, and Sketch Frenzy Fridays sketch for August 30.


(sorry, I am having a tough time embedding my links lately!)


Yesterday was a bit wet, and seeing the fallen leaves glossy inspired me to do the Polished Stone technique with a twist of clear embossing. This is a fun technique (aren't they all?) with amazing results!  
  • I followed the tutorial over at Splitcoast Stampers, adding the twist of first clear embossing the Magnificent Maple image on glossy cardstock.
  • I added some drops of Champagne Mist shimmer paint (now retired) to the glossy cardstock, just in a few random spots.
  • On the cotton ball I soaked with Rubbing Alcohol, I added drops of the following:
    • Melon Mambo, Crushed Curry, Tangerine Tango, Rich Razzleberry and Pear Pizazz
  • As I dabbed the cotton ball over the cardstock, the embossed leaves gradually appeared.  To help the images emerge, I dabbed them with a clean cotton ball when I was finished.
  • After it dried, which did not take more than several minutes, I clear embossed the entire piece of glossy cardstock with clear embossing powder.
  • As I looked at the finished piece, the colors of Crushed Curry ad Melon Mambo seems to be more prevalent, so I used those to complete the card.


Pretty bright card!  But that is the best part of fall for me, the bright, vibrant colors.

Hope all is well and remember to enjoy the moment!

~ Lauri

stamps:  Magnificent Maple, Harvest of Thanks
cardstock:  Glossy White, Whisper White, Melon Mambo, Crushed Curry
inks:  Versamark, Melon Mambo,  Crushed Curry, Tangerine Tango, Rich Razzleberry and Pear Pizazz
other:  Clear Embossing Powder, Banners Framelits, Woodgrain Embossing Folder, Crushed Curry Chevron Ribbon, Champagne Mist shimmer paint, cotton balls, rubbing alcohol
challenges:  PP161, SFF083013

Craft Project Central Card Challenge


My first card challenge as a designer!  Thanks for the folks at  Craft Project Central for inviting me to participate this month, and offering me the chance not only to design a project (that you will see in a few weeks) but also lead the September Sketch Challenge!


Here is the sketch...and here is my sample!


Check out Craft Project Central for the challenge..and play along!  Full instructions are available to September members!

~ Lauri

Sunday, September 1, 2013

Witches Brew Halloween Home Decor by Julie Beltramo


As a guest designer for the month of September, I get to share not only my project later this month, but also give you a sneak peek of the other designer works at Craft Project Central!


Julie Beltramo has designed a trio of canvases  for a fun and festive wall hanging for the upcoming Halloween happenings! It’s a great project to make for your own Halloween décor. But don’t forget to make a second one, along with the coordinating card, and give it as a gift!

Stampin Celebration Inspiration


Happy September (again) everyone, and exciting for me to be joining the Stampin Celebration Design team for the next six months!  I am honored to be among these talented paper artists, and even more excited for the challenges ahead!

Our first inspiration challenge is such a great mixture of color and shapes I know you will want to join us!


I fell in love with these colors, Coastal Cabana, Cantaloupe Crisp and Old Olive.  I created the background using the Flowering Flourishes set, then muted it by covering it with vellum.  Pearls in the corners finish it off (oops!  I just noticed the upper left one fell off!  yikes!)  lol..have to go fix that!


and a bonus .. I made a box in the bag (tried and true!) to match! 
adding Birthday Basics DSP to the supplies.


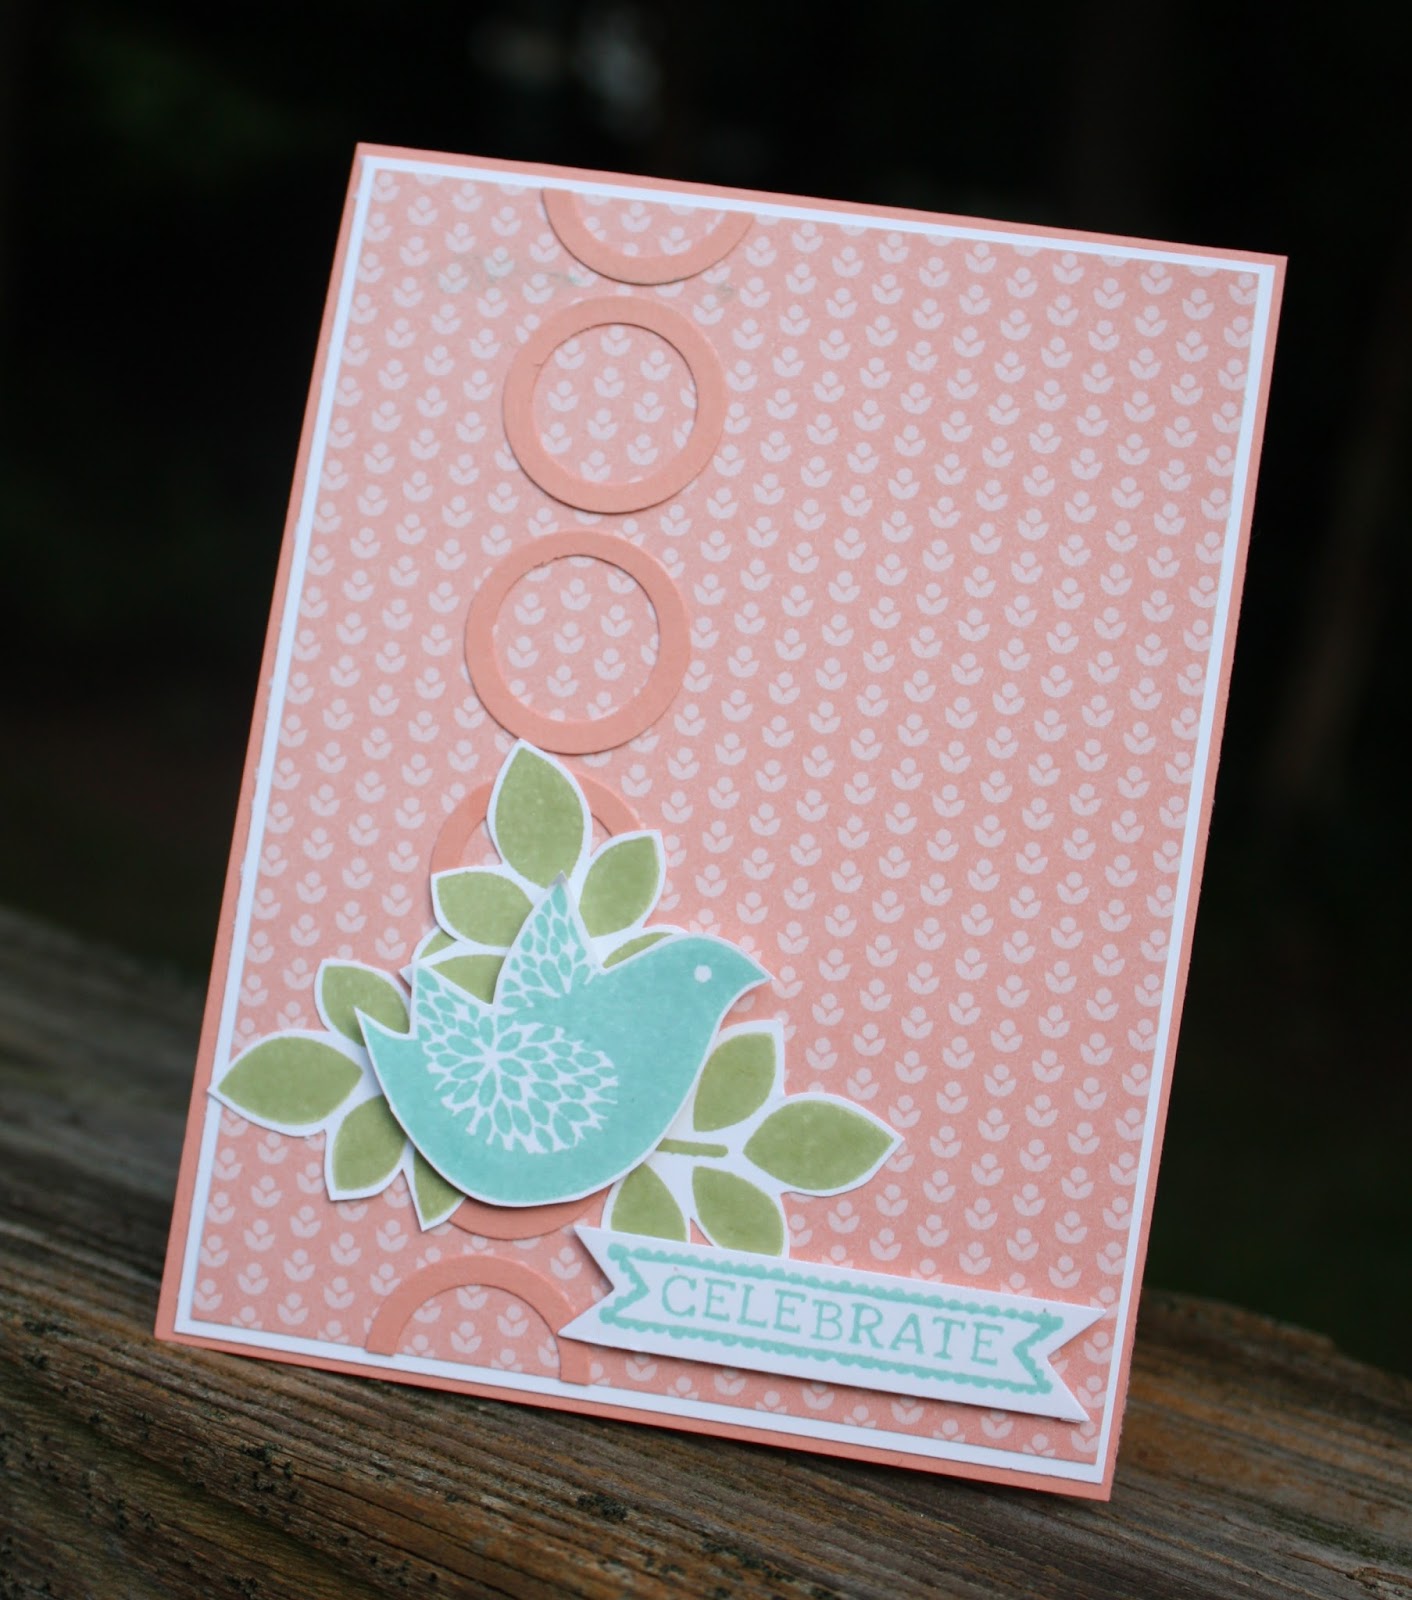
I kept with the same color scheme for the next card, but changed up the color from Old Olive to Pear Pizazz.


The bird from the hook picture caught my eye, so using the bird from the Betsy's Blossoms set, I created a little corner focal point.


The circles (inspired by the cake) were created by first punching a 3/4" circle in a sheet of Crisp Cantaloupe cardstock, then punching another 1" circle around it.

Be sure to stop by all the design team members!  I know there will be tons of inspiration, and I hope you join the challenge!
Erica Cerwin - Pink Buckaroo Designs
Erin Gonzales -Hand Stamped Style
Cori Kozak - Creative Chat
Allison Ohran - Sweet Impressions
Lauri Ingram - Paperville Crafts
Krista Jensen - Krista's Stamper Room
Anita Krul - My Paper Chronicles


Card one:
Stamps:  Daydream Medallions, Loving Thoughts, Flowering Flourishes
Inks:  Old Olive, Crisp Cantaloupe, Coastal Cabana, Versamark
cardstock:  Whisper White, Vellum, Coastal Cabana, Crisp Cantaloupe
other:  White Embossing Powder, pearls, Floral Frames Collection Framelits
challenge:  SCIC70

Card two:
Stamps:  Betsy's Blossoms. Sketched Birthday
inks:  Pear Pizazz, Coastal Cabana
Cardstock:  Whisper White, Crisp Cantaloupe, Birthday Basics DSP
other:  1' circle punch, 3/4" circle punch, Bitty Banners framelits
challenge:  SCIC70

Bag in a Box:
Stamps:  Betsy's Blossoms. Sketched Birthday
inks:  Pear Pizazz, Coastal Cabana
Cardstock:  Whisper White, Crisp Cantaloupe, Birthday Basics DSP
other:  !' circle punch, 3/4" circle punch, Bitty Banners framelits
challenge:  SCIC70

Technique Twist Challenge 6: Bleach Stamping


Happy September 1!  Time for our next Technique Twist Challenge, Stamping with Bleach!


This is such a fun technique and you can get such great effects depending on the color cardstock you use.

  • Create your own stamp pad with bleach, but putting several sheets of paper towels in a plastic container.  I folded several sheets of towels and used a plastic storage container (the square ones work great and are really cheap!)  Then, pour bleach into the container so you had a wet, but not soggy, paper towel.
  • Open the windows!  Make sure have ventilation!!
  • Choose a color (or two or three) of cardstock, darker colors work best!  Use the bleach papertowel as your stamp pad and stamp away.
  • You can stamp in versamark first if you are concerned about your stamps.  I did not do that, and immediately rinsed my stamps in cold water.
  • After you stamp, as it dries, you will see colors emerge.
  • For my twisted up version, I stamped the dictionary stamp first in early espresso on crumb cake, before I stamped in bleach.
Check out all the other design team samples...they are faboo as always!!


Pam

~ Lauri

stamps:  Lovely as a Tree, Dictionary, Teeny Tiny Wishes
ink:  Early Espresso
cardstock:  Crumb Cake, So Saffron
other:  word punch, bleach, pearls

Saturday, August 31, 2013

A Sketch and Color Challenge Get Well


Trying out a new sketch challenge today!  Where would I be without these challenges to inspire me...  ???  Today's card is for the Paper Craft Crew Sketch Challenge 56.  I also used colors from Lyssa's In Love from Color Sunday post.


Had a tough time with the photograph, but trust me that the sentiment is visible! 
  • Markers are a great way to add variety to an image.
  • Mix up your stamp sets!  There are three sets used on this card (Tag It, Six Sided Sampler and Positively Chevron).
  • This is a pretty flat card (for me at least!) I rarely stamp directly on the card base! Since SU Cardstock is so sturdy, you can definitely make it work and still have a very sturdy card.
  • Dots!  Love those dots!  I design primarily by eye, and what looks right to me;  keeping things in threes always helps!


I have a very busy September coming up!  Two posts tomorrow, one for Technique Twist and another one that will be a surprise!  I will also have my Project and Card Sketch for Craft Project Central posting over the next two weeks.

Not to mention all the fun SU Specials going on!  Today is the last day for the Paper Pumpkin $10 special!

Have a great Labor Day Weekend, and be sure to stop by tomorrow for two fun challenge posts!

~ Lauri

stamps:  Tag it, Positively Chevron,Six Sided Sampler
inks/markers:  Elegant Eggplant, Wisteria Wonder, Pear Pizazz, Smoky Slate
cardstock: Elegant Eggplant, Wisteria Wonder, Whisper White, Neutrals Paper Stack
other:  Subtles Dots, Stripes Embossing Folder,  2 1/2" Circle Punch, Hexagon Punch, Chalk Talk Framelits
challenge:  PCCCS056


Thursday, August 29, 2013

The one in Smoky Slate and Crushed Curry


I am trying to get more clever with my title posts!  Today's card is Freshly Made Sketch 101 from Linda!


I flipped the sketch sideways....here are a few highlights!

  • Another way to use that cool Chevron punch..use the punched out pieces!
  • At first I had the Smoky Slate horizontal piece plain, but decided to add some stamping using the new Encore Silver ink pad.
  • Look at your stamps a bit differently!  I cut the sentiment out of this stamp from Friendship preserves to add some extra punch to the image.
  • Love love love the new paper stacks! The flags are from the Smoky Slate sheets in the neutrals stack.
  • Always add texture!  Never too much texture in my opinion!
  • and don't forget the inside....   ; )


Looking forward to a long weekend!~
Hope all is well whereever you may be...

~ Lauri

stamps: Friendship Preserves, Flowering Flourishes
inks:  Silver Encore Metallic Pad, Smoky Slate, Crushed Curry
cardstock:  Whisper White, Smoky Slate, Crushed Curry, Neutrals Paper Stack
other:  Square Lattice Embossing Folder, Chevron Punch, Window Frames Framelits
challenge:  FMS101


Wednesday, August 28, 2013

Paper Players Sketch 160


Hope you are enjoying this last part of summer!  Certainly been a beautiful stretch of weather here!  This weeks Paper Players sketch was certainly a challenge for me!


 Not really sure I love it...I like it but not loving it!  Few things about it I do love though...

  1. The ribbon!  So easy to make a ruffly edge with the Stretch Ruffle Trim!
  2. The Chevron Punch!  Love this trellis effect!  Connie Collins has a wonderful video you can find here!  Easier than me trying to explain how I punched...flipped..and fidgeted this together!
  3. The Colors!!!  Love love love these colors together.  I used the combination of Coastal Cabana, Smoky Slate and Crushed Curry along with Eastern Elegance DSP


I would be interested to know how many readers are Google Plus folks.  I just started a "group" over there for my blog and would like to gauge interest in use!  In particular, I am toying around with the idea of using the Google Hangout feature but still learning my way around there!  Any google plus folks out there?  Would love your thoughts!

Hope all is well in your part of the world!
~ Lauri

stamps:  From the Heart
cardstock:  Smoky Slate, Coastal Cabana, Whisper White, Eastern Elegance DSP, Rose Red
inks(markers):  Smoky Slate, Crushed Curry, Coastal Cabana
other:  Ruffle Trim Ribbon (Coastal Cabana), Chevron Punch, Owl Punch (for heart)
challenge:  PP160

Sunday, August 25, 2013

Sunday Stamps Color Challenge


Normally I like color challenges, but this one is certainly a big challenge!  Today's Sunday Stamps challenge is Red, Pink and Black.


Love the big stamp in the new photopolymer set, Another Thank You.
  • I embossed the large image in black o glossy cardstock (now retired, bah!). That is a normal size (A2) card and love how big it is!
  • I used my daubers to run Melon Mambo and Real Red randomly across the background.
  • To add a little something, black dots are up in the corner!  Love those dots!


Before I made the card above, I tried a different approach but just didn't think the colors worked as well.


  • The large Thank You is embossed in black on Whisper White.
  • Using the set Polka Dot Pieces, I stamped the large and small flowers in Real Red, Basic Black and Melon Mambo. Using the Scallop Circle punch, and smaller circle punches, I punched out different parts of the flower and layered them using dimensionals.
  • Added more Melon Mambo dots to the bottom!
It's another beautiful day here in Connecticut!  Enjoy your day, wherever you are!

! Lauri

Card one:
stamps: Another Thank You
cardstock:  Basic Black, Real Red, Glossy White, Whisper White (inside)
inks:  Versamark, Real Red, Melon Mambo
other:  Neutral Dots, Black Embossing Powder, daubers
challenge: SSC57


Card two:
stamps: Another Thank You, Polka Dot Pieces
cardstock:  Basic Black, Melon Mambo, , Whisper White
inks:  Versamark, Real Red, Melon Mambo, Stazon Black
punches:  Scallop circle, various circle
other:  Brights Dots, Black Embossing Powder
challenge: SSC57


Wednesday, August 21, 2013

Freshly Made Sketch 100! Time to Celebrate!


As a past designer for Freshly Made Sketches, previous designers were offered the chance to participate in their 100th challenge!  How fun...and wow, 100!  For the 100th sketch, the team decided to go back to the very first sketch and celebrate with giveaways and extra inspiration from past designers.


And my take on the sketch...


I was inspired by one of Lyssa's In Love with Color combinations, Bermuda Bay, Melon Mambo, Blushing Bride and Smoky Slate.

  • The background is Core'dinations cardstock in Bermuda Bay that was embossed with the Pretty Print Textured Impressons folder, then sanded to reveal the inner color.
  • The Main image from Blooming with Kindness was stamped with Melon Mambo on Blushing Bride.
  • For the secondary image, I stamped the same flower in Smoky Slate on vellum.
  • The sentiment was stamped in Bermuda Bay on Smoky Slate and punched out with the large oval punch.  Two Bermuda Bay dots access the sentiment.

ETA:  I realized after I posted this that I forgot the three little thingys up in the corner on the sketch!  I added a few Dots and took a picture, but since I am off to work in a few and it is early..not the best pic!


Be sure to stop over at Freshly Made Sketches!  I hear there are giveaways and all sorts of fun samples!  And thank you to the FMS design team for asking me to help celebrate!

Have a great day and thanks for looking!

~ Lauri

stamps:  Blooming with Kindness
inks:  Melon Mambo, Bermuda Bay, Smoky Slate
cardstock:  Smoky Slate, Blushing Bride, Bermuda Bay Coredinations, Melon Mambo, Whisper White, vellum
other: Pretty Print Textured Impressions Embossing Folder, Brights dots, sanding block, oval punch
challenge:  FMS100


LinkWithin

Related Posts with Thumbnails